Little Marsupials Organic Cotton "Two Sweet" Onesie

Available at www.littlemarsupials.com

Christmas Eve Box

Adorable idea via Pinterest

Yum Yum!

Organic Green Smooties

Recipe: Classic Yellow Cupcakes with Chocolate Frosting

The classic flavors of light and fluffy yellow cupcakes and rich chocolate icing is one of my favorite treats. To me, nothing is better than the fluffy deliciousness of homemade cupcakes. This recipe is a true bakery style yellow cupcake with thick and creamy chocolate buttercream frosting made from milk chocolate and semi-sweet chocolate chips.

Classic Yellow Cupcakes with Milk Chocolate Frosting

Making cupcakes is a great way to get young kids involved in the kitchen! My little ones love the cook and bake in "their kitchen" while I am in the kitchen. Making cupcakes lends itself to kid-friendly jobs such as lining the muffin tins and icing a few cooled cupcakes! So move over Betty Crocker, grab your little ones and have fun with this classic sweet treat recipe!

Mini-Mommy in the kitchen
Mini-Mommy in the kitchen!

Classic Yellow Cupcakes

 Ingredients (makes about 2 dozen cupcakes)

  •  2/3 cup butter, softened
  • 1-3/4 cups sugar
  • 2 eggs
  • 1- 1/2 teaspoons vanilla extract
  • 2-1/2 cups all-purpose flour
  • 2-1/2 teaspoons baking powder
  • 1/2 teaspoon salt
  • 1-1/4 cups of milk 

Directions

  1. Preheat your oven to 350 degrees. In a large mixing bowl, cream together the butter and sugar until it is light and fluffy.
  2. Add the eggs (one a time). Then add the vanilla extract.
  3. Combine the dry ingredients in a separate bowl (flour, baking powder, and salt).
  4. Add the dry mixture to the creamed mixture alternately with the milk, beating well after each addition.
    Cupcake helpers! Kids in the Kitchen
    Lining the cupcake pans is a great way to involve young children!
  5. Line muffin pans with paper muffin cups. Fill the cups 3/4 full. Bake 15-20 minutes (Use the toothpick method to make sure your cupcakes are fully baked). Cool 10 minutes and then carefully remove cupcakes to cool on a wire rack. Allow cupcakes to cool completely before frosting!
    Cupcakes baked to perfection!
    Baked to perfection!
Milk Chocolate Frosting

Ingredients

  • 3/4 cups of milk chocolate chips
  • 3/4 cups of semi-sweet chocolate chips
  • 4 cups of powder (confectioners sugar), sifted
  • 1/2 cup of milk
  • 1/2 cup of butter (1 stick) 
  • 1 tablespoon of vanilla extract
    Creamy-Dreamy Chocolate Buttercream Frosting
    Creamy Chocolate Buttercream Frosting made with Milk Chocolate & Semi-Sweet Chocolate.

Directions

  1. Melt the milk chocolate and semi-sweet chocolate chips using a double boiler or melt at 50% power in a microwave safe bowl until soft (about 2 mins., stirring at 1 min.)
  2. In a large mixing bowl, combine sugar, butter, milk and vanilla extract. Add the melted chocolate and mix until smooth and creamy. Divide the icing evenly among cooled cupcakes and swirl with an off-set spatula. 


Healthy Lunches for Toddlers & Preschoolers

It can be difficult to get children to eat their veggies! Young children should eat 1 cup of raw or cooked veggies each day. This sounds like so much for a tot to eat, but it can be easily done if you split up the veggies throughout the day.
Spinach Added to Spaghetti Sauce Makes for a Tasty Lunch!
One way I like to get my children to eat their veggies is through green smoothies. You can find my favorite recipe for Organic Green Smoothies here. Dark green leafy vegetable like spinach and kale are so good for you and green smoothies with delicious sweet berries is a great way to mask these greens for the pickiest eaters!

Here are some of my other favorite ways to incorporate vegetables into my kids lunches:
  • Add frozen mixed vegetables to macaroni and cheese
  • Add spinach to spaghetti sauce and serve with small noodles
  • Roll turkey breast, cheese, and finely chopped carrots and broccoli in a tortilla
  • Sprinkle shredded carrots and thinly sliced cucumbers on a cheese sandwich 
  • Roll up turkey breast with a romaine lettuce leaf
  • Freeze small servings of vegetable soup to pull out for a quick lunch 
  • Try breakfast for lunch. Scramble eggs and cheese with red, yellow, and green peppers and roll up in a tortilla
 I hope you enjoy some of these quick and easy ways to incorporate veggies into your kid's lunches!

Little Peanut Organic Onesie- Featured Product on The Baby Burp

Little Marsupials is proud to be a seller on The Baby Burp. If you haven't visited this incredible baby, toddler and mommy marketplace yet- you definitely should! The Baby Burp offers unique gifts that you will not find in the big-box stores. If you are looking for something special for your little one or a memorable shower gift look no further!

Check out our featured product and awesome blog article courtesy of The Baby Burp!

The Baby Burp: The Baby Burp: Featured Product- Little Peanut Org...: We can't get enough of these adorable onesies from Little Marsupials Organic Baby Clothes! Here is what Shannon, mommy in chief, ...
Little Marsupials "Little Peanut" Organic Onesie **Best Seller**

Family Fun at Idlewild Park

Can you think of a better way to spend a summer day than at an amusement park? My family recently spent a day at Idlewild Park in Ligonier, Pennsylvania (within an hour drive of Pittsburgh). Idlewild Park is a such special place for young children. It has won the Golden Ticket Award for Best Children's Park for the past 3 years (We hope they win it again for 2014!) There are so many reasons why Idlewild is perfect for young children. My children (1.5 and 3.5 years old) had a blast! Here are a few highlights of Idlewild Park for the youngest amusement park enthusiasts:

1. Raccoon Lagoon
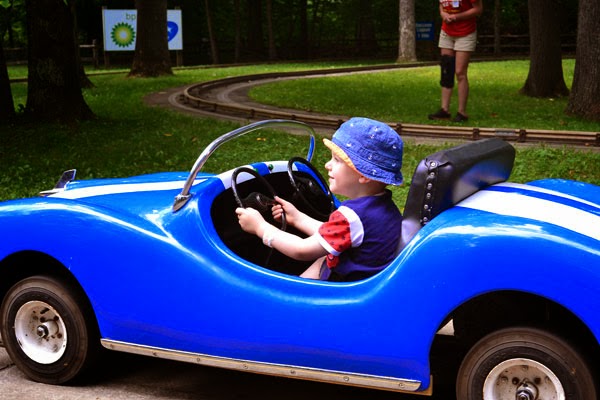
Ricky's Racers Classic Car Ride 

Raccoon Lagoon is a kiddie-park full of classic rides. Many rides are appropriate for the youngest toddler when accompanied by an adult or older child. My 19 month old baby girl had no trouble riding most rides, while my 3.5 year old son was able to ride everything. Some of their favorite classic rides includes: Dino Soars (flying dinosaur), Doodlebug (children's trolley ride), Red Baron (airplanes), Ricky's Racers (miniature car rides), and Rainbow Wheel (smaller version of the ferris wheel). Small children are also able to ride the Turtle and Tea Party Rides with an adult. Hours of fun and tons of great photo opportunities!

2. Story Book Forest

Entrance to Story Book Forest
Story Book Forest is special to me because I have so many memories visiting with my family when I was young. It is so special for me to now be able to share it with my children. The entry of the attraction is a enormous story book which read, "Here dreams are real...and so are your Story Book Friends." Children can meet their favorite characters from classic storybook tales and nursery rhymes. 


Geppetto's Workshop-Pinocchio

3. Daniel Tiger Meet & Greets
Daniel Tiger Meet & Greets 

Idlewild Park was once the home of the "Mister Rodger's Neighborhood" Trolley of Make-Believe. It was an adorable ride but with the popularity of Daniel Tiger's Neighborhood, they have closed the trolley to make room for a ride based on the new TV series. In the interim, the park hosts Daniel Tiger Meet & Greets at various times throughout the day. We did not have the opportunity to meet Daniel during our visit, but watched from afar and it looked like tons of fun for little ones. We are so excited for the new Daniel Tiger's Neighborhood attraction which is set to open during the 2015 season!

New Daniel Tiger's Neighborhood Attraction coming Summer 2015!

4. Thomas & Friends Full Steam Ahead Live
Like many other young children, my kids LOVE Thomas & Friends-from the wooden trains to the TV show. My husband and I joke that we would sit down and watch Thomas on Netflix without our kids because it is so enjoyable and relaxing! Thomas & Friends Full Steam Ahead Live is an action packed show about Thomas and his Very Useful Friends. It is sure to be a kid-pleaser!
 
5. Loyalhanna Limited Railroad
Idlewild has a classic train ride which takes you from Raccoon Lagoon (kiddie park) to the Hootin' Holler part of the park. We like to stay on the train and take the round trip. It is a peaceful ride across a beautiful creek and through a lovely wooded area. It is a nice relaxing way to end the day!

6. Memories to Last a Lifetime
So many memories are made during a day at the amusement park! For us, it was the first time our baby girl was old enough to enjoy the rides. She was a little unsure at first, but once she went on her first ride there was no stopping her. Her big brother enjoyed finally having a riding partner as well!
Just the Best of Friends!

These are just a few highlights of what makes Idlewild Park so special! There are so many more attractions such as: Jumpin Jungle, Soakzone, and many other Live! shows. There is just not enough time in one day to enjoy all that Idlewild has to offer.

Recipe: Buttermilk Blueberry Pancakes

What is better than homemade pancakes? In my house we have been know to have pancakes for breakfast, lunch, or dinner. This is my easy go-to recipe for Buttermilk Pancakes. We make many variations from plain, mini chocolate chip, and even pumpkin- but these Blueberry Buttermilk Pancakes are by far everyone's favorite.

Don't worry if you do not have buttermilk on hand (I never do). To make buttermilk, simply combine 1 cup of milk and 1 tablespoon of white vinegar or lemon juice. Stir and let it sit for 5-10 minutes- you'll have the perfect buttermilk to make your pancakes light and airy!

I made these Blueberry Buttermilk pancakes for breakfast on the 4th of July and served them with a strawberry and blueberry fruit cup- they were delicious and festive!

BUTTERMILK BLUEBERRY PANCAKES

Ingredients:
1  1/4 cups flour
1 tsp baking soda
1 tsp baking powder
1/4 cup sugar
1/2 tsp salt
1 egg, beaten
1  1/4 cup buttermilk
2 Tbsp melted butter
1 cup blueberries, fresh or frozen

-In a large bowl, sift together flour, baking powder, baking soda, sugar, and salt.

-Beat the egg with buttermilk, and butter.


-Combine the wet and dry ingredients. The batter will be slightly lumpy, be careful to not over mix (small lumps are okay).

-Add the blueberries to the pancake mix, fold the berries gently!


-Heat butter in a skillet over medium heat. spoon dollops of 1/4 cup of batter into the skillet. Cook the pancakes 2-3 minutes on each side.

-Serve with butter and/or maple syrup.


Canada Day Celebration!


Canada Day is celebrated on July 1st- just a few days before one of my favorite holidays, the 4th of July. My husband is Canadian, which makes my children part Canadian as well. Since they are now old enough to understand this, we are trying to celebrate our family's Canadian heritage as well. This past October, we celebrated our 1st official Canadian Thanksgiving. So, it only seemed appropriate that this summer we also celebrate Canada Day!
Happy Canada Day!

We decided to make Canada T-shirts and make a festive meal. To make the t-shirts we used a plain white t-shirt for my son and a white onesie for my daughter. I did my best to draw a maple leaf on the shirts and long vertical rectangles with a fabric marker resembling the Canadian flag.
Little Marsupials Organic Baby Clothes Canada Day Onesie
Canada Day Onesie

Then the fun began. My children painted the shirts using Tulip brand fabric paint. (I admit I am a little bit of a control freak and painted both of the maple leafs.) The shirts look adorable and they are so proud of them!

Painting Canada T-shirts with Tulip Fabric Paint

For our meal we made crock-pot boneless ribs with rice, cheesy broccoli, cauliflower, orange and yellow carrots. The finale of our meal was the most special- a chocolate sheet cake with the best frosting ever (both recipes from the Pioneer Woman) decorated with strawberries to look like a maple leaf. My children and I all have a sweet tooth (and my husband doesn't mind cake either!)

What a delicious end to our Canada Day!

We had an amazing 1st official Canada Day!

Creative Ideas for Easter Baskets

Are you finished filling Easter baskets for the little ones in your life? With only 2 week until the bunny makes his annual visit, I am just putting the finishing touches on this year's Easter baskets. 

We try to go lite on the candy/chocolate; and I am always looking for creative ideas for Easter goodies. You don't have to spend a ton of money to put together a really fun Easter basket. I like to start out with a few must-haves like a sought after toy, book, and one piece of candy. Then I fill the basket with fun inexpensive items (Target's $1.00 section is great for these items!)

Here are some ideas for creative Easter baskets for both babies and toddlers/preschoolers.
My daughter's Easter basket. Filled with goodies for  first time eating!


Easter Basket Ideas for Babies
Easter book
bubbles
ball
summer hat
bathing suit /trunks
Little Marsupials Organic onesies
blanket
teething ring
bibs
Organic baby food
Organic snacks (puffs, yogurt melts)
sippy cup
bowls, plates, spoons, forks
Music!
 
My son's Easter basket from last year. Filled with all things "boy".
Toddler/Preschool Easter Basket Ideas
Books
DVD/CD
learning flashcards
matching games (think Memory!)
coloring book/activity book
crayons/colored pencils
watercolor paint book
bubbles/bubble machine
sidewalk chalk
ball
bathing suit/swim trunks
summer hat
sandals/ Crocs
sand toys/ shovels
thermos
organic snacks  

Wishing you a blessed Easter season!

How to Make the Perfect Classic Lasagna

Lasagna is a favorite Sunday dinner in my house. It has all of the ingredients that we love: noodles, sauce, and lots and lots of cheese.

This past weekend, my mom made a trip to a scrumptious Italian market and came home with their homemade ricotta and mozzarella/provolone cheese blend. When she purposed we make a Sunday dinner together using these wonderfully creamy cheeses, I did not hesitate.

Besides enjoying a delicious meal together, cooking with your mom for your family is such an enjoyable way to spend a Sunday afternoon.


Classic Lasagna Ingredients
1/2 lb. of ground beef
2 jars of favorite sauce (we love Ragu Organic or Classico Organic Tomato, Herbs & Spices)
1 lb of shredded mozzarella/ provolone mix cheese
1 lb of ricotta cheese
2 eggs
box of lasagna noodles
parsley
hot pepper flake 
salt and pepper
grated Parmesan cheese

Cook
1. Heat a large pot of water on the stove. Add plenty of salt to flavor the noodles and increase the boiling point  of the water. While your water is heating, start the sauce.

2. Brown ground beef in a medium size pot until cooked through (no pink). Drain any excess grease. Add your favorite sauce and season with black pepper, parsley, and red pepper flakes. Once the sauce comes to a boil, stir and turn to a low simmer.

Cute Organic Baby Onesies- Perfect Lasagna Sauce


3. By now, your water is probably boiling. Add the lasagna noodles and stir. Cook the noodles per package directions. It is fine for the noodles to be on the "al dente" side since you will later bake the lasagna in the oven.

4. While the noodles are cooking, you can make the cheese mixture. In a large bowl, combine the ricotta cheese with the mozzarella/provolone mixture.

Cute Organic Baby Onesies Perfect Lasagna Cheese


5. In a separate bowl, crack the eggs and beat slightly. Add the eggs to the cheese mixture- mix well. Season the cheese mixture with parsley.

6. When the lasagna is done boiling, drain in a colander and rise with cool water. If you are not immediately assembling the lasagna, lay the noodles flat on a cookie sheet or plate.

Assemble

In a 13x9 inch pan (or large lasagna pan- I love the my All-Clad lasagna pan!), ladle enough sauce to cover the bottom. Layer the noodles length-wise to cover the sauce. Divide your cheese mixture in half and dollop over the noodles.

Cute Organic Baby Clothes Perfect Lasagna Noodles & Cheese

Try to smooth out the cheese slightly without disrupting the noodles and sauce.  Add a second layer of noodles and then generously ladle sauce over the noodles.

Cute Organic Baby Clothes Perfect Lasagna Layer

Layer noodles and again dollop the remaining cheese and spread evenly. Finish with a fourth layer of noodles and a generous helping of sauce. Sprinkle the top with grated Parmesan cheese.

Cute Organic Baby Clothes Perfect Lasagna Ready to Bake


Bake
Cover with foil and bake the lasagna for 40-55 minutes on 350 degrees F.

Let cool before cutting and serving. (I usually cannot wait to this step, but cooling does help the lasagna to keep its form rather than collapsing.)

Cute Organic Baby Onesies Perfect Lasagna Delicious


I love this recipe so much. It has always been my go-to recipe for company because you really cannot mess it up and it is so easy to make!


Making the Perfect Homemade Pizza Dough

Making homemade pizza is one of my family's favorite weekend activities. It is an event- from the making of the dough, to the rolling of the crust and my young children love every minute of it! I have found they love anything they can be a part of!

Aside from the fun you may have together, making your own dough is delicious, healthier than take-out, and inexpensive. In the past, I have used bread flour, but this time I chose whole wheat flour, making the dough a healthier choice for my family.  If you cook and bake at all, you probably already have the flour, olive oil, and yeast in your pantry.

If you plan on making the dough and enjoying it all in the same day, choose a day when you have time to mix your dough and let it rise for 1  1/2 hours. I have also made homemade pizza dough in advance and then froze it (wrapped in wax paper and then in a freezer bag). If you choose to freeze your dough, transfer the frozen dough to the refrigerator the night before serving.

Homemade Pizza Dough 
(makes two 12-14 inch pizza crusts)

1 cup warm water (110 degrees to 115 degrees F)

1 packet of dry active yeast (2  1/4 teaspoons)

1  1/4 teaspoons sugar

3  1/4 cups all-purpose flour or whole wheat flour, plus more if needed

1  3/4 teaspoons kosher or Himalayan salt

1/4 cup olive oil, plus more if needed


Directions

1. Pour the warm water into a bowl. Sprinkle the yeast and sugar over the water and stir. Let it sit for 5 minutes, or until the yeast dissolves and swells.

Look at that yeast mixture!

2. Using a stand mixer, fit with the paddle attachment. On low, stir together 3 cups of flour and the salt.

3. Next, add the yeast mixture and the olive oil. Mix on low speed for 10 seconds.

4. Replace the paddle attachments with the dough hook. Knead the dough mixture of medium speed for about 3 minutes or until the dough is smooth. If the dough feels sticky, add the remaining flour (1 tablespoon at a time) until the dough is no longer sticky.

5. Now put the dough in an oiled bowl, flipping the dough over once so all sides are covered in oil. Cover with a kitchen towel and place in a warm place to rise for 1  1/2 hours.

6. Once the dough has doubled in size, gently punch it down. Knead the dough by hand for a few minutes to release any air bubbles

7. Divide the dough into 2 potions- remember the recipe makes 2 pizza crusts.

8. Using flour so your dough does not stick, roll out to the perfect size crust.

Pizza Dough- Ready to Roll!

9. Last, top with your favorite sauce, cheese, and toppings of your choice.


The Perfect Crust

10. Bake at 400 degrees F for 10-15 minutes until the crust is golden and the cheese is bubbly.


Serve immediately and enjoy the homemade goodness!


.

Copycat Doubletree Hotel Cookies- The Perfect Recipe for a Snow Day

Yum-chocolate chip cookies! Even better- Doubletree Hotel Chocolate Chip Cookies. Just the thought of these sweet and chocolaty treats makes me melt.

As soon as I found out that today was a snow day for my family, I began thinking of the delicious goodies we could make together. The Doubletree Hotel's Chocolate Chip Cookies are the perfect cookie- soft and chewy on the inside (from the ground oats) while still being perfectly crisp on the outside.

These are now my go-to chocolate chip cookie because they are a little different (thanks again to the oats,lemon juice, and touch of cinnamon).  Best of all- you do not need to spend a night at the Doubletree to have these fabulous cookies!

Copycat Doubletree Hotel Cookies
(recipe make approx. 3 dozen cookies)

Ingredients
  • 1/2 cup of old fashioned rolled oats
  • 2-1/4 cups of all purpose flour
  • 1-1/2 teaspoons of baking soda
  • 1 teaspoon of salt
  • 1/4 teaspoon of cinnamon
  • 1 cup of softened butter
  • 3/4 cup of sugar
  • 3/4 cup of light brown sugar
  • 1-1/2 teaspoons of vanilla extract
  • 1/2 teaspoon of lemon juice
  • 2 eggs
  • 12 ounce bag of chocolate chips
  • 1-1/2 cups of chopped walnuts (optional)
Directions
  •  Preheat your oven to 350 degrees and line your cookie sheets with parchment paper.
  • Using a food processor or food mill, grind your old fashioned oats to a flour-like consitancy. Pour into a bowl and add: flour, baking soda, salt, and cinnamon. Set aside for later.

  • Using a mixer, combine the butter, sugar, brown sugar, lemon juice, and vanilla. Beat for 3-4 minutes until fluffy.
  • Add the eggs one at a time and beat until smooth.
  • Now, add dry ingredients in 3 batches and beat until combined.
  • Add the chocolate chips and walnuts and stir by hand. 
**For large cookies- drop 3-4 tablespoons of cookie dough 2-3 inches apart**


  • Bake for 12-15 minutes until lightly brown around the edges.
  • Let cool on wire racks.
* These cookies freeze well. I packed 2 cookies per snack bag and then in a freezer bag. These are perfect to pull out for a snack or for lunches.


I hope you enjoy these heavenly chocolate chip cookies. You'll never want to make Tollhouse Cookies again!

How to Make Homemade Granola Bars

Granola bars are a favorite snack in my house. My preschooler likes them for a snack and my husband and I grab one each morning for a quick breakfast. Between the three of us, we can go through at least 2 boxes a week. I think we have tried every variety of organic granola bars offered at both our local grocery store, as well as Whole Foods, but we can never seem to agree on a favorite. When my son suggested we make homemade granola bars, I jumped at the idea. I took a look at a few recipes online and adjusted them to my family's taste. 

Chewy Organic Chocolate Cranberry Granola Bars
Ingredients
  • 3 cups organic rolled oats
  • 1/3 cup dried cranberries (chopped)
  • 3 tbsp. coconut oil
  • 1/4 cup honey
  • 1/3 cup brown sugar
  • 3 tbsp. chocolate (chopped) 
  •  
Organic Cranberry Chocolate Granola Bar Ingredients


1. Start by combining the oats and chopped dried cranberries in a large bowl.

Organic Oats and Cranberries


2. In a saucepan, heat the coconut oil, honey, and brown sugar. Once the mixture begins to bowl, lower your hear to a simmer and stir for another minute.

3.Let the mixture cool for a few minutes.

4. Pour the hot and gooey mixture over the oats and stir until the oats and cranberries are well coated.

5. Using wax paper evenly press the mixture into a 13x9x2 in. pan coated with cooking spray.

6. Lastly, spoon chopped chocolate on top and press evenly again with wax paper.

7. Cool for a few hours (I placed the bars in the refrigerator for an hour or so to harden.)

8. Cut into granola sized bars and enjoy!

The granola bars turned out delicious! I kept a few out for the week and wrapped the rest in wax paper and froze to have later in the week.

Delicious Homemade Organic Granola Bars- Ready to Cut and Enjoy!


Have You Had Your "Green Smoothie" Today?

I often struggle getting my 3 year old to eat his vegetables. It was easy when he was younger; he loved to snack on peas, sweet potatoes, and carrots. Now that he has a taste for other foods, it is harder and harder to convince him to eat his vegetables. With our 13 month old now eating those same foods, I am trying to find creative ways to have those important greens in all of our diets.

We have found green smoothies to be a solution to our anti-vegetable dilemma. There are so many delicious recipes for green smoothies, but I like to keep it simple with organic yogurt, juice, and a selection of our favorite fruits and vegetable.
Organic Green Smoothie ingredients
  • First, add 1 cup of yogurt to your blender. We like StoneyField Farms Organic Low-Fat Plain; but you could use vanilla or any other fruit flavor.
  • Add 1 cup of orange juice and 1 cup of low-fat milk.
  •  Next, add your fruit. We love to use frozen fruit because it is always fresh and it makes the smoothies ice cold. I recently found a few different varieties of organic frozen fruit at our local Costco including 3 Berry Blend, Mango, and an Ant-Oxidant Blend. We love the anti-oxidant blend because it includes the super-fruits: blueberries, cherries, and pomegranates. 
  • Now add your vegetables. We usually switch between organic baby kale or baby spinach. With the kale craze these days, organic baby kale is readily available at most grocery stores including Wal-Mart. My baby boy loves when we add the kale and refers to them as "leaves" (I don't think he qualifies them as vegetables at all.) If I have baby carrots on hand, I will add them as well. You could really add any vegetables you like.
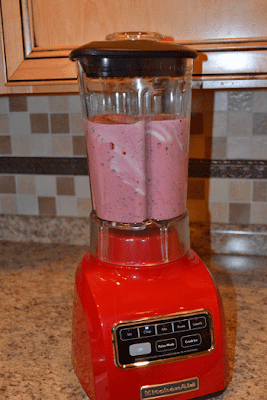
  • It is time to put your blender to work. I usually start mine on the "crush ice" setting to crush the frozen fruits and then switch to the "stir" option. Blend for about a minute.
Green Smoothie with Organic Fruit

If you have a picky eater like I do; they will not be disappointed. The berries and juice provide the perfect cover-up for the vegetables and is an icy, sweet, refreshing treat. This recipe is not recommended for younger babies because it has a few ingredients not suitable for babes under 1 year (orange juice, low-fat yogurt, and low-fat milk). However, you could easily adapt the recipes so your baby could enjoy the green smoothies as well.
I Love Organic Green Smoothies!

My family enjoys eating our veggies this way and I hope you will too!

New Tradition:The Christmas Eve Box

This weekend, I began to think about how quickly this past Christmas had come and gone. As much as I tell myself each November that I will slow down and really enjoy the season, the hustle and bustle of daily work schedules, family commitments, baking, and shopping make the month between Thanksgiving and Christmas fly by.

Last Christmas, baby girl was only 4 weeks old; so we were really just enjoying Christmas while getting used to being a family of four. This year, we knew we wanted to start special Christmas family traditions of our own. We had planned on a trip downtown to see a "Santas Around the World" display, but the stomach bug hit our family just days before Christmas. With our trip downtown being out, I began to explore my Christmas Pinterest board for ideas. If you are on Pinterest, I’m sure you have seen the “Christmas Eve Box”. The idea is to give your children each year on Christmas Eve a gift of new pajamas, a holiday book, movie, and a snack. Easy enough. I had already picked up the matching boy and girl version of snowman pajamas. A trip to Target completed the box with the book, “The Grinch Who Stole Christmas”, the DVD “The Cat and The Hat Knows A lot About Christmas”, and a box of Annie's Organic Honey, Chocolate, and Chocolate Chip Bunny Crackers. The Christmas Eve box was festively wrapped and placed under the tree as the first gift of Christmas. Our course, my 3 year old wanted to open it right away, but we managed to wait until after the Christmas Eve church service.
New Family Tradition: Christmas Eve Box
Christmas Eve Box

The Christmas Eve box was a hit! The favorite gifts were definitely the DVD and Annie’s bunnies. Later, we all curled up together enjoying our snacks while we watched the “Cat”. And luckily, I remembered to wash their pajamas before wrapping the gift, so they were soft, clean and ready to be worn as they dreamed of St. Nick. 

What's Inside the Box?

New Christmas Pajamas

 Do you have any special Christmas or Christmas Eve traditions?  I’d love to hear about them!